Hello Friends!
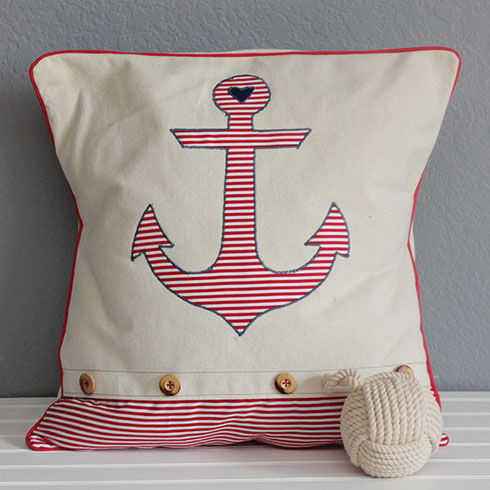
It’s Silhouette Challenge Day!!! Yay! That means myself and a bunch of my closest Silhouette Challenge Facebook Buddies are sharing our latest projects with you. This month’s theme was fabric. I have been wanting to make some new pillowcases for my living room. This challenge was just the kick I needed to get started. Since we are close to the beach I have a very nautical living room. These pillows fit right in. These pillows were heavily inspired by a pillow I saw on Tea Rose Home. I love how she added the buttons and different fabric to the side.
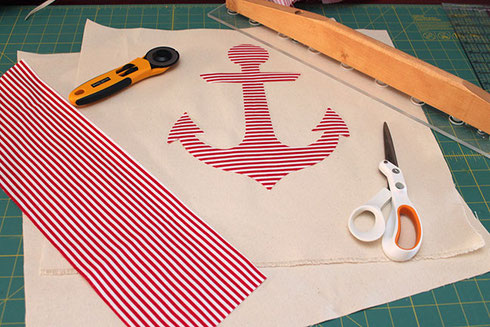
I decided I was going to use the anchor I had used in my post last year about onsies.
Source: lilmrstori
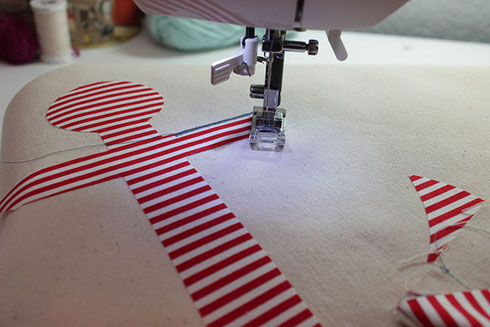
3.I pieced together the front panel by folding the canvas and pinning it to the stripped fabric. The sew the edge of the canvas down. Trim excess canvas.

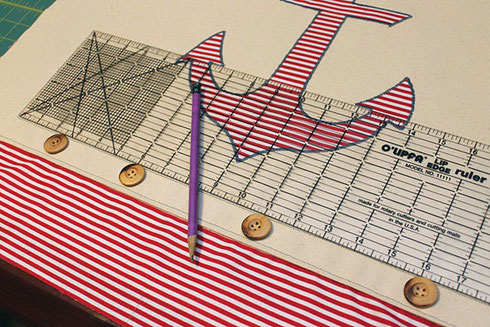
4.I sewed another seam just for looks. To make that line straight I just used a piece of tape as my guide. I am not very good at sewing straight if I don’t have any guides on my fabric. The tape helps keep me and my stray lines in check.
6.I marked where all my buttons would go. I found these wooden buttons during a shopping trip to the LA Fabric District. I had no idea what I would use them for but I love collecting fun buttons. I am so glad I picked them up that day because they worked perfect for this pillow!
I hand sewed the buttons on. I’d rather hand sew them than mess with my settings on the sewing machine. ;) Plus I was really caught up in a show that night so I didn’t mind the extra time on the couch!
I love the way these pillows turned out! It definitely gives the room a nautical flair!
If you are looking for some more fabric inspiration using your Silhouette check out these great blogs below!!
Oh and I actually have a clickable graphic this month thanks to the genius mind of Kristy from Please Excuse My Craftermath. So all you need to do is click on a picture that tickles your fancy and it will take you right to that post! Cool, right?!
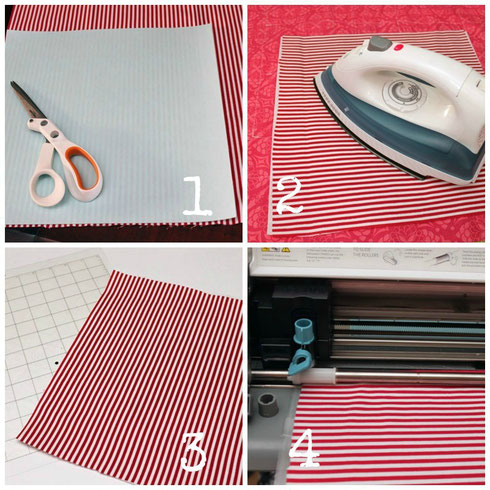
1.So start out by cutting a 12 x 12 square of fabric. Then iron on the interface. Silhouette Brand Sewable Interfacing or Heat N Bond Lite work well. Place it on the mat and send it through the Silhouette.
2.My pillow was 19 x 19. So here are my measurements.
So my front panel was 19.5 by 19.5. My fabric piece was 19.5 by 6. My two back panels measures 19.5 x 12 and the other 19.5 x 10. I like to have more than enough fabric then find myself needing more. So I always over estimate.
Once you have your pieces cut go ahead and iron your anchor on.
I used canvas for most of the pillow and regular cotton fabric for the bottom.

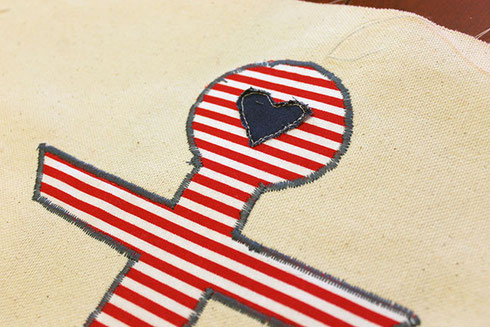
5.Once my panel was together I used the zig-zag stitch in blue thread. I stitched all the way around the anchor.
I had my handy B helping me out that night. He told me he was drawing “Hot Wheels racing tracks”.
I free handed a heart on a piece of scrap fabric and stitched it on top of the anchor.
7.Sewing piping is really pretty easy. It makes your pillow have a really finished look.
Run red piping around the edges of the front panel. Then sew down. Now add your two back panels right side faced down. Pin. The sew all the way around your pillow on that same seam of your piping. Flip pillowcase to show the outside and your are done.